Thursday, December 6, 2012

Quilts for Some Nick-named Fetuses...Feti?


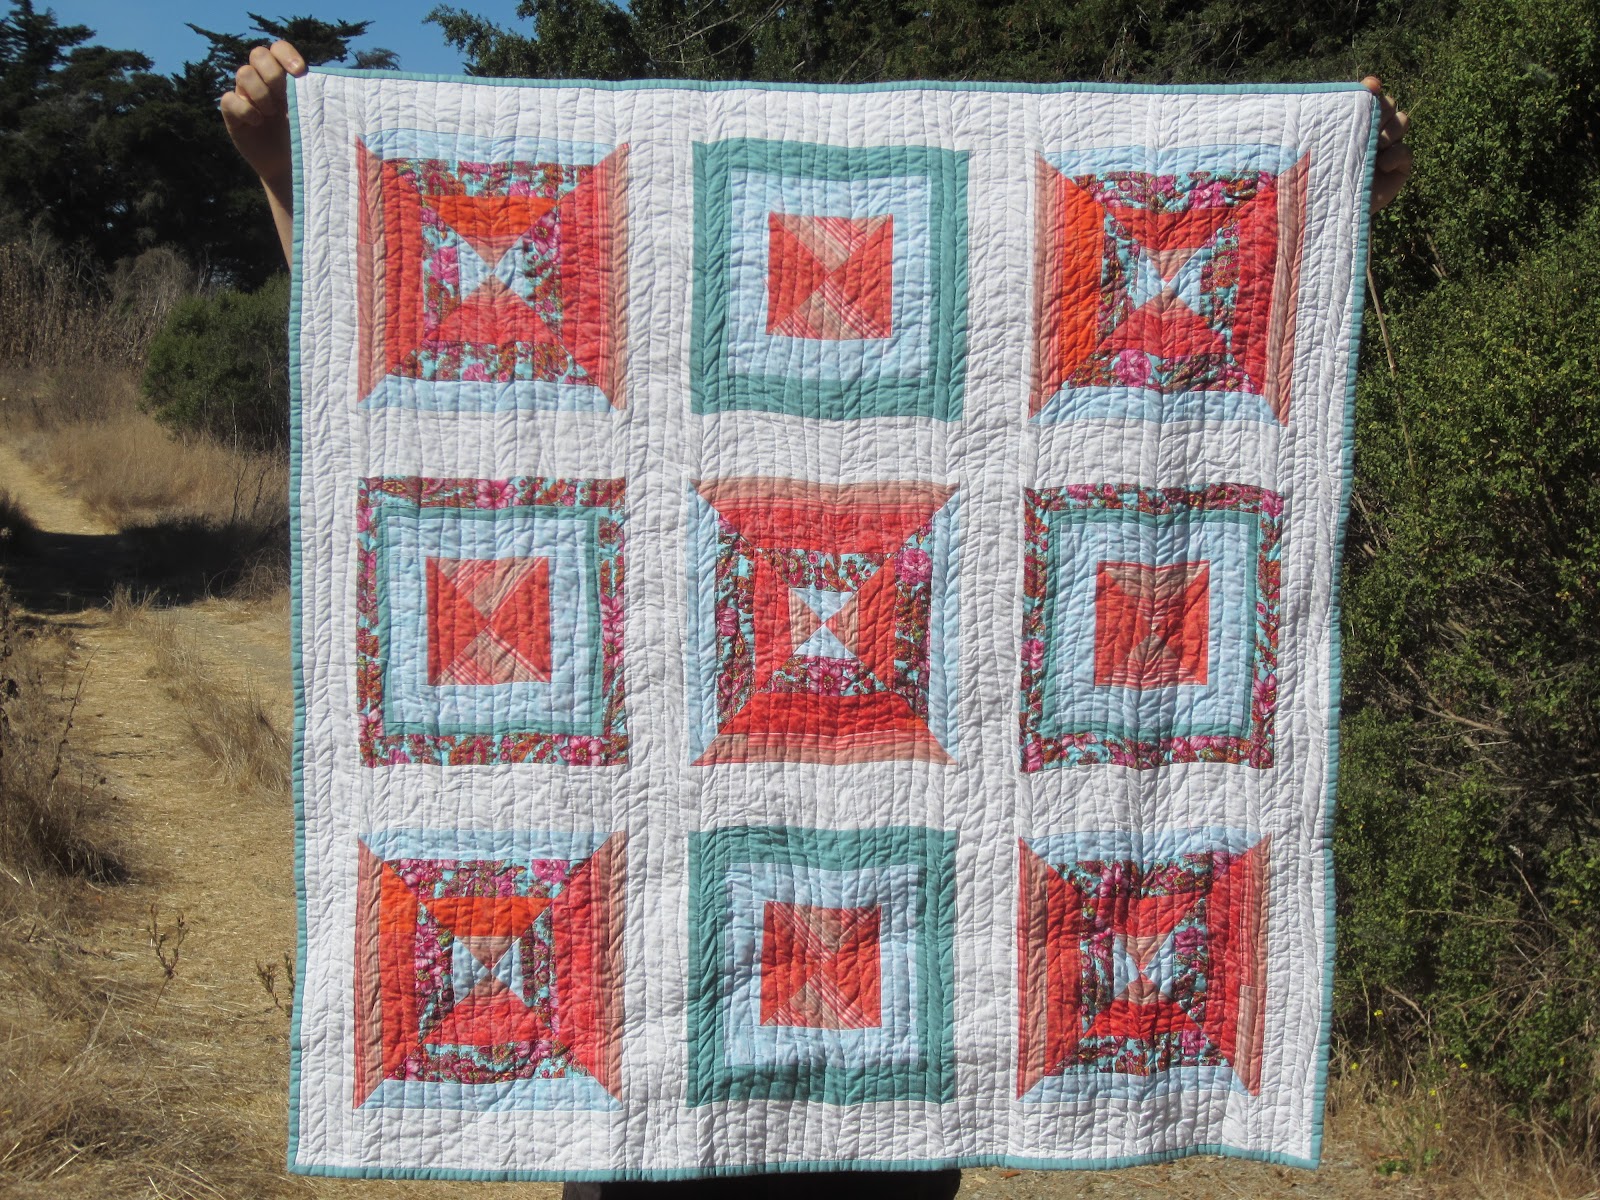
So I had no reason to wait to post about these quilts, because the person who I was making them for did not have my blog address...however I was lazy, so I did not post. These quilts are exciting because one of them is my first commissioned quilt! Huzzah! First I shall show a picture:


So the story is that my friend from work, Emily, is having a baby boy this January, and so I told her I was making her a quilt. Well, she was quite pleased with that idea, and decided she wanted me to also make one for her sister who is also having a baby boy around the same time. She wanted the two quilts to match each other but not be identical. Hence the results above. And I should credit my inspiration for the pattern, Rita from redpepperquilts, see here: redpepperquilts

I made Emily's first, and was a little nervous about making a good BOY quilt, because I think it is a lot easier to make girly ones, as 70% of fabric is flowery. Well, I struck gold and was inspired by this superawesome robot fabric I found. I mean, who doesn't LOVE robots? Even people who are afraid that robots will attack and steal old people's medicine for fuel think robots are awesome.

Good thing he has Old Glory Insurance

I dont' have too many close up pictures, but here are the robots:


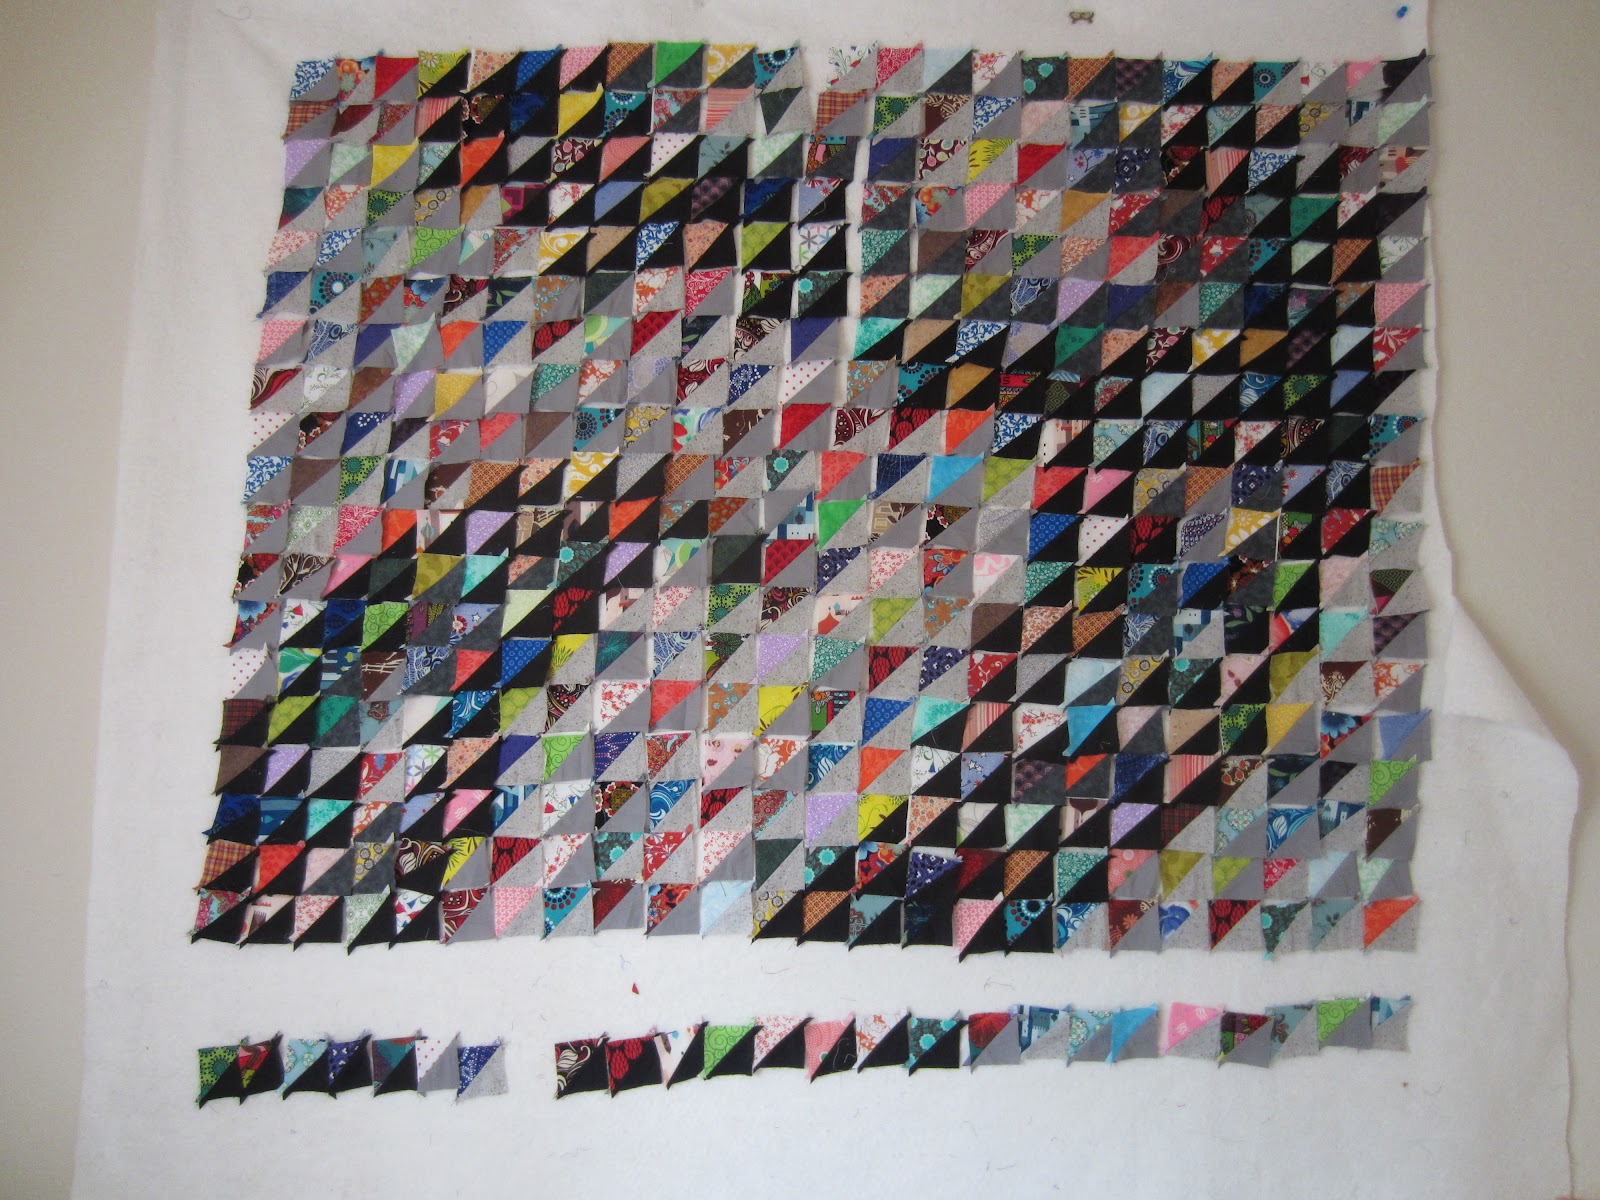
Anyway I really like this pattern because it is really easy, but looks really good, plus it doesn't get boring making the blocks because you get to come up with different combinations of fabrics. I chose a lot of fabrics for this quilt - maybe too many, some only get used in one or two blocks. I did the same quilting as Rita from redpepperquilts does in her quilts, which I think looks really nice, especially on the back. I used a yellow and white polka dot fabric for the back, because I knew yellow was Emily's favorite color.


So once I finished Emily's quilt, I started on her sister's. I was actually intending to use the same robot fabric and maybe just do a different binding color and backing, but when I got to the store to buy more robots, they didn't have any. I thought I might still have enough left from the first one, but then I saw......MONSTERS! Cute, adorable monsters!


Some babies do prefer scary monsters to adorable ones...
Here are the monsters on the quilt back:
She also wanted me to embroider the fetus's code name, "Tootsie," on the quilt.

I originally didn't have the black and white striped fabric, and the black monster fabric was the only black fabric in the quilt. It looked weird, and I think the black and white stripes added just what I was looking for. The back looks like this (same quilting pattern):


The reason for the decoration is actually that I was about an inch too short on my plaid backing fabric. I decided that the quilt definitely needed more monsters anyway, so this is what I did, and I really like it.

Oh and here's the name embroidered on Emily's quilt. Her fetus's code name is Statt, which I am going to post on the internet as the city in Germany where the baby was conceived. haha. Emily if you see this and want me to remove that statement, we can negotiate.


All in all, I am very pleased with the results...especially the walking foot that I got for my birthday and used for the first time on the "Tootsie" quilt. It worked very nicely. I would like to thank my first client, Emily, and let anyone who is reading this blog know that if they ever want to commission a quilt, just let me know. It was great fun. I hope she and baby Statt enjoy it as much as I enjoyed making it! 


Sunday, September 23, 2012

A baby blanket

I have been wanting to use fabrics from my stockpile, and so I decided to make a baby blanket. Also this is the first item I am trying to sell on Etsy. You can see my shop: iwanttobequilting Etsy shop, hopefully I will add more items!
 I like using short-cut type techniques to make the blocks, so in this one I tried a strip technique for the corner and center blocks. I sewed long strips of light blue, floral, orange, and pink/orange stripes together, and then cut them into triangles. I then arranged the triangles to form a square as seen above. I creates a block that is easier to construct than it looks...which is what I like! For the other four blocks, I kind of just used what I had. I think it worked out well.  I quilted it with a bunch of semi-squiggly lines about 1/2" apart.

I also decided to branch out my picture-taking locales. The above picture was taken on the side of a road of a park in Oakland. See that "golden" grass in the background? I might just keep my quilts in my car trunk and stop any time I see a good place. Some common stops I already do make are "America's Best Gasoline" station or the parking garage of my office....maybe I can photograph there...
When you search "quilt gas station." Apparently this is real...
 Well instead I have these pictures:

Anyone who can guess where this picture was taken gets bonus points.


 The backing was that floral print from the front:


Tuesday, August 14, 2012


My latest project in-progress is a kind of scrap-mosaic quilt. I realized I have a lot of fabric I haven't used and was liking the idea of something more scrappy. So I got the idea of creating a background image on the quilt using half-square triangles with one half black or grey and one half a scrap. (That sentence will hopefully make more sense once you look at the picture).

My sketch is below:

Thank goodness for AutoCAD

So the background image is just an abstract swirl. I think it kind of looks like the bottom half of a mermaid. I was brainstorming other images to do, and I drew a pretty spiffy Abraham Lincoln, but I couldn't convince myself that anyone else besides me would be amused by it.

Do I not amuse you?

I also thought about a bird on a branch and a spherical shape. However, in the end I went back to my original concept. I hope I am satisfied in the end.

Here it is on my wall, minus the top eight rows:
It is quite fun rearranging the squares
Shown below is the portion I have sewn so far. Boy are there a lot of seams....the finished size of each square is 1.75", so that is pretty darn small. I used the shortcut method of sewing each half square triangle in which two sandwiched square pieces of fabric are sewn together on the diagonal and then cut apart to create two identical half-square triangles. A handy-dandy explanation of the method is described here.


Orange Purple People Eater Purse

I call this Orange and Purple People Eater Purse because I am pretty sure I could fit a toddler inside it.

Suffice it to say, it turned out way bigger than I planned.

I wish it was smaller, but the quilt pieces were so small, I don't think I could have made it much smaller without changing the quilt block.

Nope. No toddler inside.
 I found the pattern in a book from the library and thought it was cool. I kind of makes a curvy shape using a bunch of triangles and quadrilaterals. Maybe I will make a quilt someday using this pattern, although there are lots of little pieces as you can see...


Sunday, August 5, 2012

Meta-Lonestar Quilt

So today I am finally posting about the quilt that I had been working on for months. It is queen-size, so I don't feel so bad that it took so long. It was slightly my goal to enter it in the county fair, however I didn't finish in time, and I didn't want to rush something into which I had already invested so much time (and $). Ben really wanted me to enter it into the fair, and when we actually went there he kept saying how mine was so much better. I don't know if that is true, but I am really happy with the results. If I had entered it and won 1st place, the prize money was about $8. No joke. That I think that is the cost of a ticket to get into the fair (not including parking fee). It is almost insulting to win such an insignificant amount of money...but mostly it is just amusing.

Anyway, the actual quilt. I posted about it a little while ago here. I was going for a Turkish tile color scheme. I wanted a complex design in the middle with a blank background...I feel like the blank background makes it a little more modern (maybe that is just me). The center is a lonestar design surrounded by little baby lonestars and de-capitated baby lonestars (I really did de-capitate them; I made a whole one and then sliced it in half).

Therefore, I name it the Meta-Lonestar quilt.
When I take pictures for work, I sometimes put a hammer or pencil in it for scale...for this, I put myself in for scale.
So meta....
For the quilting, I kind of went around in circles, then I outlined the star on the edges. I was convinced I wouldn't be able to quilt it with my little machine, but it actually went quite smoothly. However, there were a few tug-of-war episodes with the machine as I stood up and tried to pull the bunched up fabric through the opening in the machine arm.
Kind of like this...

And after a couples tug-o-wars, this was the result. Pretty good for a chubby ten-year old Chinese boy, right?
 For the back, I stumbled upon a fabric with my exact color scheme; it wasn't in the quilting fabric area of Joann's because it is some apparel-y fabric by April Johnston (from Project Runway...yay). Then I just used pieces of fabric that were in the quilt top to create that strip of strips.

And now it is in our room! For the pillow shams, I wanted something more simple, since the quilt itself is so busy. I recreated one of the stars and put half of one on each end of the pillow. I quilted in white for contrast and echoed the star shape. I do think it is kind of cool how the pillows sitting next to each other create a single star. Ooh...that could be some barf-tastic symbol for Ben and me "completing each other".
Yes, my nightstand is a plastic set of drawers. Your eyes are not mistaking you.


This was one of the results when I searched for "barf-tastic" on google. It is a naked baby made of marzipan, and I agree that it is barf-tastic.
In conclusion, I am pretty proud of how the quilt turned out. The center lonestar was pretty quick and easy to construct; the rest of it was what took a long time. Those baby lonestars are pretty small and there were 48 I had to make. I am thinking of entering this quilt in the county fair next year. Maybe I will win $8!

Thursday, July 19, 2012

I have been waiting a long time to post this quilt. It is a baby quilt for Kali's baby girl: coming soon to a hospital near you. If you live in Florida. I started the quilt pretty much as soon as she told me the sex of the baby. I couldn't post before I gave it to her, and this is why I am posting it now when I finished it in like April. I originally took some pictures of the quilt, but accidentally deleted them off the camera before uploading them to the computer. Kali graciously took some photos for me, which I think look better than any I have taken so far. And as a bonus, she took them at the beach so they look especially blogworthy. The "beach" near my apartment is the grossest part of the San Francisco Bay...stinky marshy mudflats covered in various bird droppings.

Anyhoo, I based the pattern on the "Swoon" quilts I have seen all over the online quilting universe. There was a big "quilt-a-long" online and I decided I really like the pattern.

 
Models: Jtizzle and Miley

This seems especially blogworthy: beach grasses blowing in the background, worn wooden fence....

I did some hand stitching in the center of each star. That was really fun. I tried to do it with really thick embroidery thread, so you could see it really well. I discovered some color combinations worked better than others for visibility. Purple thread on busy green printed fabric was not as visible as dark blue thread on orange fabric. Lesson learned. I still think it looks good. You can see a little bit of it in the orange star on the top photo, maybe even in the last photo....

I decided I really like baby quilts because: they are small, don't require a ridiculous amount of fabric, easy to baste, easier to quilt, and I can finish quickly! My next post will be my beastly queen size quilt. All of those things I just listed are not true about that quilt...

Friday, June 29, 2012


This entry has two items: the quilt I made my niece last Christmas, and a camera case I made recently. 

THE QUILT. 
As I said, I made this quilt for my niece last Christmas and I somehow lost the pictures I took of it. So after a reminder from my mother-in-law, I remembered to take pictures when we were visiting in Elk Grove on Father's Day. We had been lured into the visit by a promise of some cherry pies.  The pies were indeed delicious...and of course it was fun to see the fam and honor Pappa Petersen and Ante.  Ben spent Father's Day celebrating how he isn't a father.  I believe that was the same Sunday in which he told some little six-year-olds at our church discussing future ice cream prospects, "I can eat ice cream whenever I want because I have money because I have job!"

So you can see why he was celebrating not being a father. 

Anyhoo, I made sure to get an overall shot (thanks Ben for holding that quilt so fabulously, in such a non-fatherly fashion), but I thought it would be fun to get some pics with the girls on it. (See further down)

The quilt design is simple, just a bunch of squares, but I really like the result. As I look at bloggy people's quilts I often realize that simple quilts often look fabulous. I keep leaning towards designs that look more complex...and now I am thinking I should go back to more simple designs. Especially since I can only straight-line quilt. 
 
The quilt is Lizzie's (Layla's quilt is an older entry). And here are the lovely ladies:


I got a better second picture of Layla, because she understands the concept of posing for a picture, albeit by a small margin. Being three years old she is kind of in constant motion. Meanwhile, Lizzie was kind of rolling around or staring at various moving objects in the room...often not the camera.

NEXT UP, THE CAMERA CASE:

I had thought about doing a camera case for a while, but never came up with a good idea. The reason I thought about doing a camera case is because we have a camera and it has no case.  The reason I decided to do it two weeks ago is that I had finished my quilt top for that big red and blue quilt except for two pieces of white fabric. I ran out, and I was waiting for a certain Joann's coupon to activate. Yup, that is me....life revolves around coupons....

I couldn't think of anything super amazing, so I looked in my plastic bag o' scraps, and somehow decided on these red and black fabrics. I just started sewing them log-cabin style, and then this happened:

Front

Back

That button is one of those extra buttons they give you with sweaters or pants.  That is pretty much how all my buttons are acquired.  When I purchase a new clothing item with buttons, I always throw the extra button into my underwear drawer (Obviously!...?), so that is where I went searching the other day. Maybe I should move them into my sewing box....

It is also might be amusing for anyone who has received a quilt of mine to recognize any fabrics that I am using again and again.  This camera case is like 90% from fabrics I used in my mom's quilt.  The red silk, which was originally from my bridesmaid's dress for Kali's wedding was used in my mom's quilt, and also the Bargello quilt. One of the white and pink fabrics on Lizzie's quilt is from an awesome stash of late 80's - early 90'sy fabric that my former roommate Chiquis gave me from her mom. I hope to use more of those fabrics. Some are pretty darn neon, which = awesome. I guess I find it interesting to think of the history of some of the fabrics.

Sunday, May 13, 2012

So a little while ago I took a picture of my sewing workspace to preserve it in history...kind of for the same reason I took a picture of our old apartment in Oakland [see below]...so I can remember the awesome crappiness.
That is one of those TV tray tables I got at some furniture junkyard place in Berkeley. Recently I ducktaped a cardboard box to the back of the sewing machine to increase the surface area....

Our apartment in Oakland. The lot next door was vacant, with the exception of an old vacuum and a few other pieces of junk thrown in there. Also notice the giant billboard right near us, and the hobo walking past (he was brushing his teeth with his finger as he walked past). I decided that the way to find out if you live in the ghetto is to look on Google Maps Street View, and if a hobo just happens to be in that single representative photo of your house, it is the ghetto.
Anyways, I didn't mean to go off on my old apartment. I just hope that someday I will get a proper table and workspace for quilting, but for now it totally works.

So my current project is a queen-size quilt that I intend to put on our bed. I am kind of obsessed with the color combination of red, dark blue, and turquoise ever since going to Turkey and seeing it in all the elaborate tiles throughout the mosques and Topkapi Palace. I also wanted to do a quilt that was a single large design (not a grid of blocks) if that makes any sense. I wanted it to be similar to all those henna-type designs I am always doodling (anyone who has sat next to me in church or any meeting knows what I am talking about) My original design was this:
I still think that design is cool, and I spent a long time coming up with it and choosing fabric. However, once I started making it...I hated it. yuck yuck yuck.
First two center blocks
See? I think it looks a lot more intricate in the sketch because the sketch is so small. But I started making it and the shapes were so big and it did not look intricate (even though it was complicated to make). I pretty much never want to make a quilt that looks easier to make than it was. 

So I changed it! I had been interested in doing a lonestar quilt, and I saw a really cool Amish quilt (see link, image on the right). The reason I liked it is because it is a more interesting and elaborate lonestar motif. So here is what I have so far on the wall. 
It has been very frustrating coming up with the proper dimensions for the surrounding blocks because it is all diagonals. I drew it in AutoCAD at my office after work to help get exact dimensions, however it has still been tricky. I learned how to do Y seams for this quilt from a tutorial from some extremely adorable lady's video online.

We shall see how it turns out...

Monday, April 30, 2012

This is the quilt I gave my grandma for her 90th birthday.  I wanted to do a Log Cabin block and I thought the asymmetrical diagonal pattern would give it a kind of modern twist. I found the Log Cabin blocks really fun to do. Maybe it was because I used mostly a set of 2.5" wide strips that were precut (thanks to my mother-in-law), which made it a lot quicker. Woohoo!

 Here's a close up of some of the quilting. I followed the overall diagonals and did random spacing of quilting lines. Below is the back, which my grandma really liked. She hadn't seen a quilt with a design on the back. Now I wish I had a picture of her with the quilt. Well instead, I will just post a picture from her birthday!


 At last! The quilt I made for my mom for her birthday. It was based on the color scheme I saw in a Kaffe Fassett quilt in a book from the library. I spent a LONG time figuring out the design and arranging the blocks, and I do like the result.  I like the black fabric around the edge, I think it really makes everything else stand out. Here is the back:

The part that looks white is actually light green...I guess my camera didn't pick that up very well. I am now just glad that the quilt is safe in the hands of my mother....there was a horrible Fedex ordeal involved.